
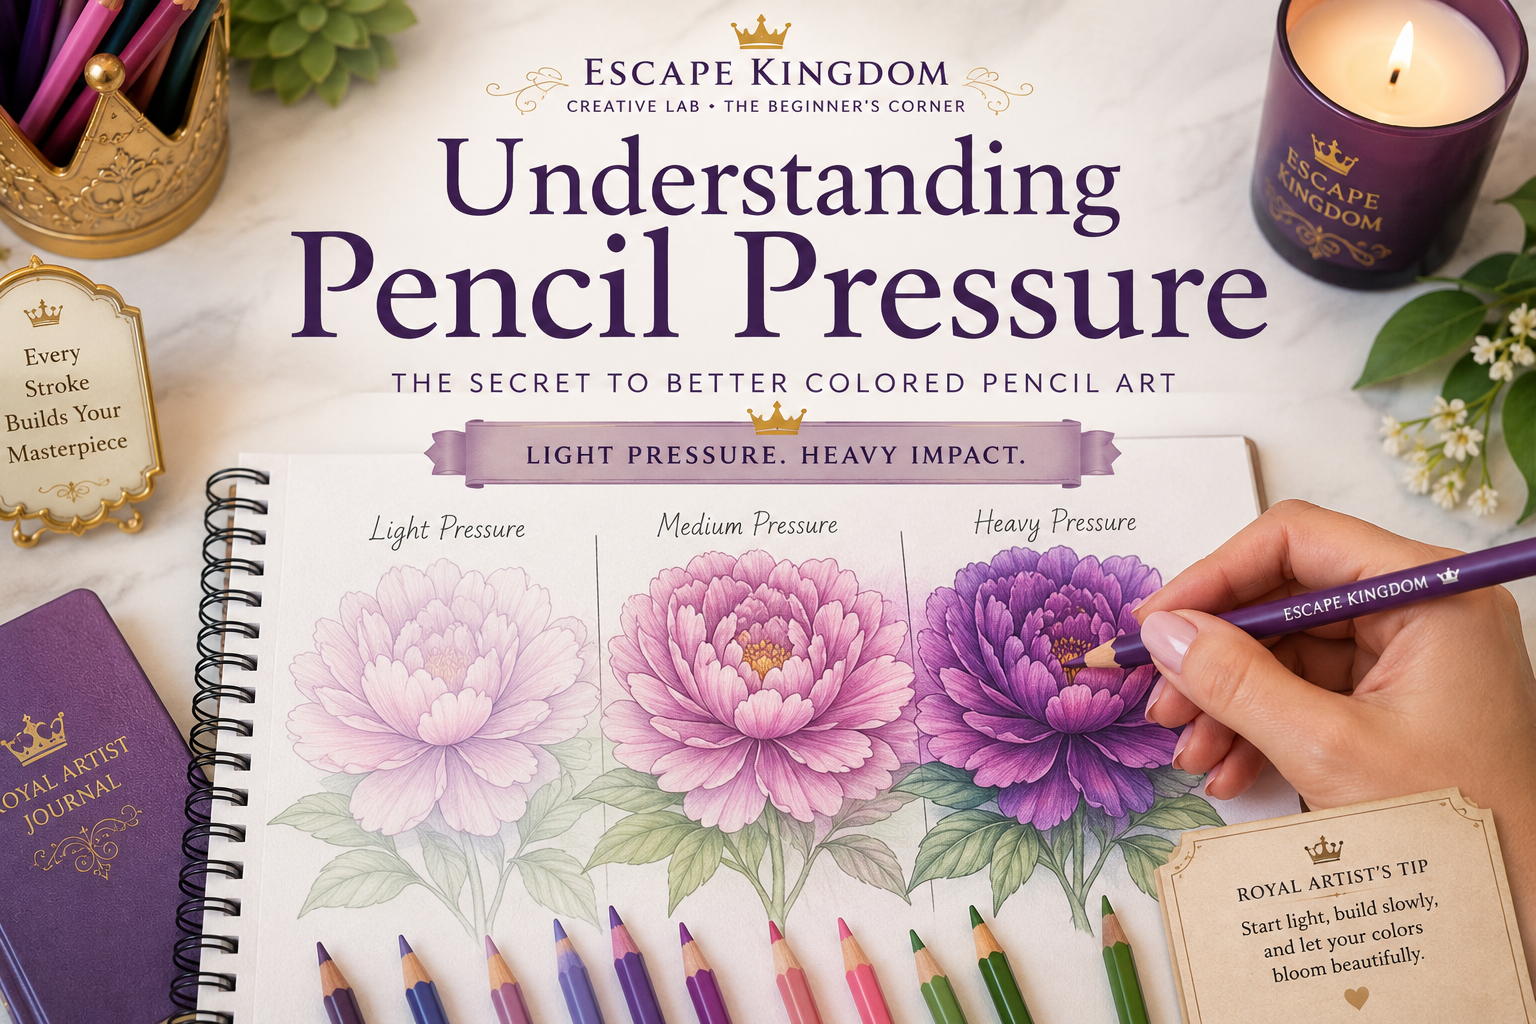
Understanding Pencil Pressure
The Secret to Smoother, Richer, More Beautiful Colored Pencil Art
Welcome to the Creative Lab
Imagine two people sitting side by side, using the exact same coloring page, the exact same set of colored pencils, and the exact same paper.
One finishes with rich, velvety color transitions that look almost painted.
The other ends up with streaky patches, harsh lines, flattened paper, and colors that refuse to blend.
The surprising part?
The difference usually isn’t talent.
It isn’t expensive supplies.
It isn’t even years of experience.
More often than not, it’s pencil pressure.
Learning how much pressure to apply—and just as importantly, when to apply it—is one of the biggest turning points in every colorist’s journey.
Whether you’re coloring relaxing floral pages, whimsical fantasy scenes, realistic portraits, or intricate mandalas, controlling pencil pressure will help you create smoother gradients, richer colors, and cleaner details with the pencils you already own.
By the end of this guide, you’ll understand why experienced artists rarely rely on brute force. Instead, you’ll learn how to let your pencil work with the paper rather than against it.
This single skill will quietly improve almost everything else you learn in the Creative Lab.
⭐ Why This Article Matters
Many beginners believe that better coloring starts with buying a more expensive pencil set.
While high-quality pencils can certainly make coloring more enjoyable, they won’t automatically improve your results.
A beginner using premium pencils with poor pressure control will often struggle to blend colors, create soft shading, or build smooth layers.
On the other hand, an experienced colorist can produce remarkably beautiful work using a modest set of pencils simply because they understand how to control pressure.
Think of pencil pressure as the “volume control” of your coloring.
Instead of being limited to just on or off, you have an entire range of possibilities.
With light pressure, you can gently build transparent layers.
With moderate pressure, you can deepen colors while still preserving the paper’s texture.
With heavy pressure, you can create bold accents and polished finishes—but only when the time is right.
Understanding these differences doesn’t just improve one technique.
It improves every technique you’ll learn from this point forward.
That’s why this lesson sits near the beginning of the Escape Kingdom Creative Academy.
It is one of the foundations upon which nearly every other colored pencil skill is built.
📚 In This Guide
- What Is Pencil Pressure?
- Why Beginners Often Press Too Hard
- The Escape Kingdom Pressure Spectrum™
- How Pressure Changes Your Colors
- Light vs. Medium vs. Heavy Pressure
- Common Pressure Mistakes
- Practice Studio Exercises
- Royal Artist’s Tips
- Frequently Asked Questions
- Continue Your Creative Journey
🌿 The Escape Kingdom Philosophy
At Escape Kingdom, we don’t believe beautiful coloring comes from expensive tools or natural talent alone.
We believe it comes from understanding small skills that make a big difference.
Pencil pressure is one of those skills.
Master it, and you’ll find that your colors become smoother, your blends become softer, your shading becomes more realistic, and your confidence grows with every page you complete.
Every lesson in the Creative Lab is designed to build on the last, helping you develop lasting artistic habits rather than quick tricks.
In the next section, we’ll begin exploring The Escape Kingdom Pressure Spectrum™—a simple but powerful way to understand and control the pressure you apply every time your pencil touches the paper.
End of Part 1
Next: Part 2 – The Escape Kingdom Pressure Spectrum™: Learning to Control Every Stroke
Module 2 – The Escape Kingdom Pressure Spectrum™: Learning to Control Every Stroke
The Escape Kingdom Pressure Spectrum™
One of the biggest reasons beginners struggle with colored pencils is that they unknowingly think in only two pressure levels:
- Press lightly
- Press hard
Professional colorists don’t think this way.
Instead, they constantly move through a spectrum of pressure, making tiny adjustments throughout every coloring page.
At Escape Kingdom, we’ll use a simple system that makes these adjustments easy to understand and remember.
Rather than memorizing numbers or percentages, imagine that every pencil stroke belongs to one of four “kingdoms” of pressure.
🌬 Level One — Whisper Pressure™
“Barely touching the paper.”
Imagine you’re brushing dust from the surface of a butterfly’s wing.
That’s Whisper Pressure.
The pencil almost glides across the paper.
You’re not trying to create bold color.
You’re simply introducing pigment.
Best Used For
✔ Planning colors
✔ First layers
✔ Testing color combinations
✔ Creating soft skies
✔ Smooth skin tones
✔ Gentle gradients
✔ Large background areas
What It Looks Like
The paper still shows through.
The tooth of the paper remains almost untouched.
The color appears transparent rather than solid.
If you gently rub your finger across the page, you’ll still feel the texture of the paper.
Why It Matters
This is where beautiful coloring begins.
Professional artists rarely start with heavy pressure because doing so immediately limits their options.
Whisper Pressure gives you freedom.
It allows you to adjust colors later, deepen shadows gradually, and build smooth transitions instead of harsh ones.
👑 Royal Artist’s Tip
Don’t try to “finish” a section during your first pass.
Think like a watercolor artist.
You’re creating the foundation—not the final masterpiece.
🍃 Level Two — Breeze Pressure™
“Your everyday coloring pressure.”
If Whisper Pressure is barely touching the paper…
Breeze Pressure feels comfortable and relaxed.
This is where you’ll spend most of your coloring time.
In fact…
Many experienced colorists complete 80–90% of an entire page without ever pressing harder than Breeze Pressure.
That surprises many beginners.
Best Used For
✔ Building color
✔ Creating depth
✔ Layering pigments
✔ Establishing midtones
✔ Preparing areas for blending
✔ Smooth transitions
What It Looks Like
Colors become richer.
The paper still has visible tooth.
Additional layers can still be added easily.
Mistakes remain fairly forgiving.
Why Professionals Love Breeze Pressure
This pressure allows colors to mix together naturally.
Instead of forcing pigments into the paper…
…you’re gradually encouraging them to build upon one another.
The result is smoother color and greater realism.
🌳 Level Three — Forest Pressure™
“Strong—but still controlled.”
Now you’re beginning to add confidence.
Forest Pressure is firm enough to create dramatic shadows and saturated colors…
…without crushing the paper.
This pressure should appear much later in your coloring process.
Best Used For
✔ Deep shadows
✔ Rich saturation
✔ Emphasizing texture
✔ Dark accents
✔ Defining important details
Common Beginner Mistake
Many beginners start here.
Experienced artists usually finish here.
That one difference changes everything.
Royal Artist’s Comparison
Imagine building a brick wall.
You don’t start by placing the roof.
You build the foundation first.
Color layers work exactly the same way.
💎 Level Four — Crown Pressure™
“Reserved for the final touches.”
This is maximum pressure.
The pigment is firmly pressed into the paper.
The tooth becomes almost completely filled.
At this stage, adding additional layers becomes difficult.
That means this pressure should almost always come near the end of your coloring process—not the beginning.
Best Used For
✔ Burnishing
✔ Bright highlights
✔ Polished finishes
✔ Final blending
✔ Tiny details
✔ Finished edges
Why It Is Called Crown Pressure
Because this pressure represents the final “crowning” stage of your artwork.
You’ve already built beautiful layers.
Now you’re polishing them.
👑 Royal Artist’s Tip
Crown Pressure is a destination—not a starting point.
Many beginners accidentally begin every coloring page with Crown Pressure.
Professional artists usually arrive there only after dozens—or even hundreds—of lighter strokes.
The Biggest Beginner Misconception
One of the most common beliefs among new colorists is:
“If I want darker color, I should press harder.”
Actually…
Professional artists usually create darker colors by adding more layers, not more pressure.
Imagine trying to make coffee.
Would you pour the entire bag of coffee into one cup?
Of course not.
Instead…
You gradually strengthen the flavor.
Colored pencils behave in much the same way.
Five gentle layers often produce richer color than one heavy layer.
Why Heavy Pressure Can Hurt Your Artwork
Pressing too hard too early often causes problems that are difficult to fix.
These include:
Flattened Paper Tooth
The tiny texture that holds pigment becomes compressed.
Future layers have nothing left to grip.
Poor Blending
Pigments can’t mix properly because they’re already packed tightly into the paper.
Waxy Build-Up
Heavy pressure can create shiny areas long before you’re ready to burnish.
Streaky Color
Instead of smooth transitions…
You’ll often see visible pencil strokes.
Faster Pencil Wear
Heavy pressure wears down the pencil tip much more quickly.
You’ll sharpen more often…
…and waste more pigment.
Escape Kingdom Practice Studio
Exercise 1 — The Pressure Ladder™
This exercise will train your hand far better than reading another paragraph.
Draw five identical rectangles.
Use only one colored pencil.
Color each rectangle using a different pressure.
| Rectangle | Pressure |
|---|---|
| 1 | Whisper |
| 2 | Light Whisper/Breeze |
| 3 | Breeze |
| 4 | Forest |
| 5 | Crown |
Now step back.
Instead of seeing five shades…
You’ll begin to recognize five different artistic tools.
Repeat this exercise using:
- blue
- green
- red
- brown
Notice how each pigment responds differently.
👑 Royal Artist Challenge
Print one of your Escape Kingdom floral coloring pages.
Choose one single leaf.
Instead of coloring it all at once…
Color it in four separate passes.
Pass 1
Whisper Pressure
Pass 2
Breeze Pressure
Pass 3
Forest Pressure
Pass 4
Tiny touches of Crown Pressure
Now compare it to another leaf colored using heavy pressure from the beginning.
The difference is often dramatic.
This simple exercise teaches your hand something that words alone cannot.
🌟 Escape Kingdom Insight
Here’s something you may never hear in a typical coloring tutorial:
Pressure control is not about pressing harder or softer.
It’s about making intentional decisions.
Every stroke asks a question:
“What does this area need right now?”
Sometimes the answer is almost no pressure.
Sometimes it’s firm pressure.
The secret isn’t strength.
The secret is control.
When you stop thinking in terms of force and start thinking in terms of purpose, your coloring begins to change.
Continue in Part 3
In the next chapter you’ll discover:
- Why paper tooth changes everything.
- How different colored pencil brands respond to pressure.
- How to develop muscle memory for effortless pressure control.
- The Escape Kingdom Feather Stroke™, Floating Hand™, and Layer Builder™ exercises.
- A printable practice worksheet for mastering pressure before starting your next coloring page.
Module 3 – Building Muscle Memory: Training Your Hand to Color with Confidence
Why Knowing Isn’t Enough
After reading Parts 1 and 2, you now understand what pencil pressure is and why it matters.
But understanding a skill and performing it consistently are two very different things.
Think about riding a bicycle.
You can read an entire book explaining balance, steering, and pedaling—but until your body experiences those movements repeatedly, you’ll still wobble.
Colored pencil pressure works the same way.
The goal isn’t to constantly think:
“Am I pressing too hard?”
Instead, your hand should naturally choose the right pressure without conscious effort.
That ability is called muscle memory, and this chapter is all about developing it.
What Is Muscle Memory?
Despite the name, your muscles don’t actually “remember.”
Your brain and nervous system learn repeated movement patterns until they become automatic.
At first, every stroke requires concentration.
Eventually, your hand simply knows how much pressure to apply.
This frees your mind to focus on creativity instead of mechanics.
That’s why experienced colorists appear so relaxed while working.
They’re not constantly calculating pressure—they’ve trained it.
👑 Royal Artist’s Insight
The best artists aren’t those who never make mistakes.
They’re the ones whose basic techniques have become so natural that they can devote their attention to color, composition, and creativity.
Pressure control is one of those foundational techniques.
The Escape Kingdom Three-Part Stroke™
One mistake beginners often make is using the same pressure from the beginning of a stroke to the end.
Instead, imagine every stroke has three stages.
🌱 1. Landing
The moment your pencil first touches the paper.
Begin gently.
Avoid jabbing the paper.
Imagine an airplane landing smoothly rather than dropping from the sky.
🌿 2. Gliding
Once the pencil is moving comfortably across the paper, maintain a steady pressure.
This is where most of the pigment is placed.
Aim for smooth, even movement rather than speed.
🌸 3. Lifting
As the stroke finishes, gradually reduce pressure.
This creates soft transitions instead of abrupt stops.
It also helps prevent visible “start and stop” marks.
Why This Matters
The Three-Part Stroke™ creates:
- smoother gradients,
- cleaner blends,
- more natural-looking shading,
- less visible pencil marks.
It’s a simple habit that can dramatically improve the appearance of your coloring.
The Escape Kingdom Floating Hand™
Many beginners unknowingly press harder because they’re resting too much weight on their hand.
Try this instead.
Rest only the side of your hand lightly on the paper.
Allow your wrist to move freely.
Imagine your hand floating just above the page, with the pencil doing the work rather than your arm pushing downward.
This relaxed posture makes it much easier to vary pressure naturally.
👑 Royal Artist’s Tip
If your fingers begin to ache after only a few minutes, you’re probably gripping the pencil too tightly.
Try loosening your grip just enough that someone could gently slide the pencil from your fingers without a struggle.
You should still feel in control—but never tense.
The Feather Stroke™ Exercise
This is one of the most valuable exercises you can do.
On a sheet of scrap paper:
- Draw a horizontal line about 6 inches (15 cm) long.
- Start with almost no pressure.
- Gradually increase to Breeze Pressure.
- Return to Whisper Pressure before lifting the pencil.
Repeat this 20 times.
The goal is to create a line with no sudden jumps in darkness.
Think of a feather floating gently to the ground.
Escape Kingdom Practice Studio
Exercise 2 – The Gradient Ribbon
Draw a long rectangle.
Instead of coloring it in sections, create one continuous gradient:
- Left side: Whisper Pressure
- Middle: Breeze Pressure
- Right side: Forest Pressure
Now create a second ribbon, returning smoothly from Forest back to Whisper.
This teaches your hand to change pressure gradually rather than suddenly.
The Circle Challenge™
Draw ten circles.
Color each one using only Whisper and Breeze Pressure.
Your goal is not bold color.
Your goal is consistency.
Each circle should appear:
- smooth,
- even,
- free of streaks,
- free of shiny spots.
If one side is noticeably darker than the other, slow down and try again.
Why Speed Is the Enemy
Beginners often color too quickly.
Fast movements usually lead to uneven pressure because your hand has less time to make subtle adjustments.
Professional colorists often work more slowly than you’d expect.
Not because they’re hesitant—but because they value control over speed.
Ironically, slowing down now will help you color faster later because you’ll spend less time correcting mistakes.
The Layer Builder™ Exercise
Choose a single colored pencil.
Draw a small square.
Instead of trying to achieve full color immediately, build it using five passes:
| Pass | Pressure |
|---|---|
| 1 | Whisper |
| 2 | Whisper |
| 3 | Breeze |
| 4 | Breeze |
| 5 | Forest (only if needed) |
Compare it to another square colored using Crown Pressure from the beginning.
Most readers are surprised by the result.
The layered square often looks:
- richer,
- smoother,
- deeper,
- more professional.
Common Signs You’re Pressing Too Hard
While coloring, pause occasionally and ask yourself these questions.
Does the paper feel shiny?
If yes, you’ve probably reached Crown Pressure too early.
Are your pencil strokes clearly visible?
You may be relying on force instead of layers.
Is your pencil tip becoming blunt very quickly?
Heavy pressure is often the cause.
Do your fingers feel tired?
That’s another sign you’re working harder than necessary.
Can you still add another layer?
If not, you’ve likely compressed the paper’s tooth.
👑 Royal Artist’s Tip
Treat every layer as though another layer is still coming.
This mindset naturally encourages lighter pressure and leads to smoother, more flexible coloring.
Escape Kingdom Creative Challenge
Choose one of your Escape Kingdom floral coloring pages.
Instead of trying to finish it today, divide the process into three sessions.
Session One
Apply only Whisper Pressure.
Do not try to make anything look finished.
Session Two
Return tomorrow.
Build the colors using Breeze Pressure.
Begin defining light and shadow.
Session Three
Add only the darkest shadows and brightest highlights using Forest and occasional Crown Pressure.
When you compare the finished page to one completed in a single sitting with heavy pressure, you’ll often notice:
- smoother transitions,
- richer colors,
- cleaner details,
- a more polished overall appearance.
Building a Daily Habit
Like learning a musical instrument, consistent practice is more effective than occasional marathon sessions.
Even 10–15 minutes a day spent practicing pressure control will produce noticeable improvements over time.
Consider warming up with one quick exercise before every coloring session:
- Pressure Ladder™
- Feather Stroke™
- Gradient Ribbon
- Circle Challenge™
- Layer Builder™
These simple drills help your hand “remember” the movements before you begin your artwork.
🌟 Escape Kingdom Reflection
Pressure control isn’t about making your hand stronger.
It’s about making your hand more sensitive.
The greatest improvement comes when you stop trying to force pigment into the paper and start allowing your layers to build naturally.
Every gentle stroke is an investment in the finished piece.
Every controlled layer gives you more freedom later.
That’s one of the quiet secrets behind artwork that looks smooth, luminous, and effortless.
Continue in Part 4
In the next chapter, you’ll apply everything you’ve learned to real coloring techniques, including:
- layering,
- blending,
- shading,
- burnishing,
- creating highlights,
- coloring large backgrounds,
- and knowing exactly when to move from Whisper Pressure to Crown Pressure.
We’ll also introduce the Escape Kingdom Layer Pyramid™, a step-by-step system for deciding how much pressure to use at each stage of a coloring project, making this lesson even more practical and uniquely aligned with Escape Kingdom’s teaching style.
Module 4 – Applying Pencil Pressure to Real Coloring Techniques
From Practice to Beautiful Coloring
You’ve learned what pencil pressure is.
You’ve trained your hand to recognize different pressure levels.
Now it’s time to use that knowledge where it really matters—on your coloring pages.
This chapter answers one of the most common beginner questions:
“How do I know which pressure to use while I’m actually coloring?”
The answer is simpler than you might think.
Instead of randomly changing pressure throughout your artwork, you’ll learn to use a consistent progression that matches the natural stages of every coloring project.
At Escape Kingdom, we call this progression the Layer Pyramid™.
👑 The Escape Kingdom Layer Pyramid™
Imagine building a castle.
You wouldn’t start by placing decorative flags on the towers.
You’d begin with a strong foundation.
Beautiful coloring follows the same principle.
           💎 Crown Pressure
          Final polish & burnishing

        🌳 Forest Pressure
     Shadows • Rich saturation • Details

       🍃 Breeze Pressure
    Layering • Building color • Blending

      🌬 Whisper Pressure
 Planning • Mapping • First color layer
Every stage builds naturally upon the previous one.
Skipping straight to Crown Pressure is like trying to build the roof before laying the foundation.
Stage 1 — Planning with Whisper Pressure™
The first layer should never try to impress anyone.
Its job is simply to establish direction.
Think of it as sketching with color.
During this stage:
- choose your base color,
- establish the light source,
- gently map darker areas,
- preserve highlights.
Don’t worry if the page looks pale.
That’s exactly what you want.
Example: Coloring a Flower Petal
Instead of immediately pressing hard with pink…
Apply a very soft layer over the entire petal.
Leave the brightest highlight almost untouched.
At this stage, you’re preparing the paper—not finishing the artwork.
Stage 2 — Building with Breeze Pressure™
Now the coloring begins to come alive.
Using the same color—or perhaps a second similar color—begin strengthening the areas that need more depth.
This is where most of your coloring happens.
Professional colorists often spend the majority of their time in this stage because it offers the greatest flexibility.
Each additional layer increases richness without sacrificing smoothness.
Escape Kingdom Example
Imagine coloring a green leaf.
Instead of using one heavy layer of dark green:
Layer 1
Light yellow-green.
Layer 2
Medium green.
Layer 3
Olive green.
Each layer uses mostly Breeze Pressure.
The result feels more natural than a single dark layer ever could.
Stage 3 — Defining with Forest Pressure™
Only after your colors have been built should you begin adding stronger pressure.
Forest Pressure helps define:
- cast shadows,
- folds,
- texture,
- depth,
- contrast.
Because the previous layers remain visible beneath, these darker accents appear richer rather than harsh.
Example: Coloring Hair
Imagine coloring flowing brown hair.
The base color has already been layered.
Now use Forest Pressure only within the deepest strands.
Notice what you are not doing:
You’re not pressing equally hard across the entire section.
Only the darkest areas receive this extra emphasis.
Stage 4 — Finishing with Crown Pressure™
Crown Pressure is reserved for the final polish.
At this point, you’re no longer building color.
You’re refining it.
This stage might include:
- smoothing transitions,
- burnishing,
- sharpening details,
- strengthening tiny accents.
Use it sparingly.
One of the hallmarks of experienced colorists is knowing when to stop.
👑 Royal Artist’s Tip
If you’re wondering whether it’s time to use Crown Pressure…
It probably isn’t.
Most beginners reach this stage far too early.
Instead, ask yourself:
“Can this area benefit from one more light layer?”
If the answer is yes…
Choose another light layer instead.
Applying Pressure to Different Subjects
Different parts of a coloring page respond differently to pressure.
Let’s look at a few examples.
🌸 Flowers
Best approach:
Whisper → Breeze → Breeze → Forest
Only tiny amounts of Crown Pressure should be needed.
Petals usually look softer when burnishing is kept to a minimum.
🍃 Leaves
Leaves often contain stronger contrast.
Suggested progression:
Whisper
↓
Breeze
↓
Forest
↓
Selective Crown
Focus the strongest pressure along the veins and deepest shadows.
☁️ Sky Backgrounds
Large backgrounds require patience.
Almost all of the coloring should remain within:
Whisper
↓
Breeze
Heavy pressure often creates:
- streaks,
- shiny patches,
- uneven texture.
Instead…
Build the sky gradually using multiple light passes.
🐦 Feathers
Bird feathers benefit from controlled variation.
Use:
Whisper
for soft downy areas.
Forest
only where shadows naturally occur.
Avoid burnishing every feather.
Leaving slight texture creates a more realistic appearance.
👩 Hair
Hair is built through contrast.
Use:
Whisper
for highlights.
Breeze
for midtones.
Forest
for shadow groups.
Tiny touches of Crown Pressure
only within the darkest strands.
🧺 Woven Objects
Basketry, rope, and woven fabrics naturally contain repeated texture.
Instead of pressing harder…
Allow your pressure to change rhythmically with the weave.
This creates more believable texture than force alone.
Escape Kingdom Practice Studio
Exercise 3 — One Leaf, Four Stages™
Print one of your Escape Kingdom botanical coloring pages.
Choose a single leaf.
Complete it in four separate passes.
Pass One
Whisper Pressure
Map the shape.
Pass Two
Breeze Pressure
Establish the main color.
Pass Three
Forest Pressure
Add depth around veins and shadows.
Pass Four
Tiny touches of Crown Pressure
Only where the darkest shadows belong.
Then compare it to another leaf colored in one heavy layer.
The layered version almost always appears:
- smoother,
- richer,
- more realistic.
Common Technique Mistakes
Mistake 1
Using Crown Pressure for every layer.
Instead:
Reserve it for the end.
Mistake 2
Trying to achieve full color immediately.
Instead:
Build slowly.
Mistake 3
Changing pressure randomly.
Instead:
Follow the Layer Pyramid™.
Mistake 4
Ignoring the light source.
Pressure should support the lighting.
Highlights remain lighter because they receive less pigment—not because they use a different pencil.
👑 Royal Artist’s Challenge
Choose one flower from an Escape Kingdom coloring page.
Complete it twice.
Version A
Use heavy pressure from the beginning.
Version B
Use the Layer Pyramid™.
After finishing, compare:
- smoothness,
- color richness,
- blending,
- realism,
- paper texture.
Ask yourself:
Which flower looks more natural?
Most readers are surprised by how dramatic the difference becomes.
Escape Kingdom Reflection
Pressure is much more than the force you apply with your hand.
It’s a way of communicating with the paper.
Gentle pressure whispers.
Moderate pressure builds confidence.
Firm pressure creates drama.
Maximum pressure delivers the final flourish.
When each stage happens at the right moment, your coloring develops depth, harmony, and realism that can’t be achieved by pressing hard alone.
Learning when to use each level of pressure is what transforms coloring from simply filling spaces into creating artwork.
Continue in Part 5
In the next chapter, you’ll put everything together through a series of complete Escape Kingdom projects.
You’ll discover:
- the Royal Coloring Workflow™, a repeatable process for any coloring page,
- printable practice worksheets,
- subject-specific drills,
- self-assessment checklists,
- and a 7-day Pressure Mastery Challenge designed to build confidence one coloring session at a time.
Module 5 – The Royal Coloring Workflow™: Complete Projects, Self-Assessment & the 7-Day Pressure Mastery Challenge
From Technique to Habit
By now you’ve learned:
- what pencil pressure is,
- how different pressure levels affect your coloring,
- how to control your hand,
- and how to apply pressure to flowers, leaves, hair, skies, and other subjects.
But knowing techniques is only half the journey.
The real transformation happens when those techniques become your natural workflow.
In this chapter, you’ll learn the Escape Kingdom Royal Coloring Workflow™—a repeatable process you can use on virtually every coloring page.
Whether you’re coloring a simple flower or an elaborate fantasy illustration, this workflow will help you work more confidently, more consistently, and with far less frustration.
👑 The Escape Kingdom Royal Coloring Workflow™
Instead of asking:
“What should I do next?”
Follow these seven stages every time you begin a coloring page.
👀 Stage 1 — Observe Before You Color
Spend one or two minutes studying the page.
Ask yourself:
- Where is the light coming from?
- Which objects are closest?
- Which areas should remain brightest?
- Where will the darkest shadows probably appear?
- Which colors work well together?
This short planning stage prevents many common mistakes.
🎨 Stage 2 — Choose Your Color Family
Rather than selecting one pencil…
Choose three to five related colors.
Example:
Leaf
- Yellow Green
- Grass Green
- Olive Green
- Dark Green
Using multiple related colors creates more depth than relying on one pencil alone.
🌬 Stage 3 — Map with Whisper Pressure™
Lightly establish your base color.
Do not try to make anything look finished.
Your goals are simply to:
- cover the paper evenly,
- preserve highlights,
- establish direction.
🍃 Stage 4 — Build with Breeze Pressure™
This is where your artwork begins to develop richness.
Slowly deepen:
- midtones,
- gentle shadows,
- color transitions.
Remember:
You’re building color—not forcing it.
🌳 Stage 5 — Define with Forest Pressure™
Now begin strengthening:
- folds,
- veins,
- textures,
- shadow edges,
- areas needing greater contrast.
At this stage the page should already look mostly complete.
💎 Stage 6 — Finish with Crown Pressure™
Reserve maximum pressure for:
- burnishing,
- final details,
- polishing,
- tiny accents.
Ask yourself:
“Does this area truly need maximum pressure?”
Often the answer is “not yet.”
👀 Stage 7 — Review Before Calling It Finished
Walk away for five minutes.
Return with fresh eyes.
Then ask:
- Are my highlights still visible?
- Are my darkest shadows dark enough?
- Does anything look flat?
- Have I over-burnished?
- Is another light layer all that’s needed?
Sometimes the best improvement comes from one gentle final layer rather than heavier pressure.
🌿 The 80/20 Rule of Pressure
Here’s an observation you’ll notice among experienced colorists.
Approximately:
- 80% of a coloring page is completed using Whisper and Breeze Pressure.
- Only about 20% requires Forest and Crown Pressure.
Many beginners reverse these percentages.
Learning this balance dramatically improves smoothness and control.
Escape Kingdom Practice Studio
Project 1 — The Royal Leaf Study™
Choose one botanical coloring page from Coloring Kingdom.
Color only one leaf.
Do not color the entire page.
Focus entirely on pressure control.
Checklist
□ Planned before coloring
□ Whisper base layer
□ Breeze layering
□ Forest shadows
□ Crown accents only where necessary
□ Preserved highlights
□ Smooth transitions
Only after completing this successfully should you continue to the next leaf.
Project 2 — The Four-Petal Challenge™
Choose one flower with four similar petals.
Color each petal differently.
Petal One
Too little pressure.
Petal Two
Too much pressure.
Petal Three
Random pressure.
Petal Four
Follow the Royal Coloring Workflow™.
Now compare all four.
Which looks the most realistic?
This simple comparison teaches more than dozens of pages of theory.
Project 3 — The Shadow Journey™
Choose one object.
Instead of thinking about color…
Think only about pressure.
Can you create depth using one colored pencil simply by changing your pressure?
Try it.
You’ll begin seeing pressure as another artistic tool—not just a physical action.
👑 Royal Artist’s Self-Assessment
After completing a coloring page, score yourself honestly.
| Question | Yes | Needs Practice |
|---|---|---|
| Did I begin with Whisper Pressure? | □ | □ |
| Did I build gradually instead of rushing? | □ | □ |
| Did I avoid heavy pressure too early? | □ | □ |
| Are my blends smooth? | □ | □ |
| Are highlights preserved? | □ | □ |
| Did I reserve Crown Pressure for the end? | □ | □ |
| Does the page still show subtle texture? | □ | □ |
Don’t aim for perfection.
Aim for improvement.
🌟 The Escape Kingdom Seven-Day Pressure Mastery Challenge™
Practice just 15–20 minutes a day.
Day 1
Pressure Ladder™
Learn to recognize the four pressure levels.
Day 2
Gradient Ribbon™
Practice changing pressure gradually.
Day 3
Circle Challenge™
Create ten evenly colored circles using Whisper and Breeze Pressure only.
Day 4
Layer Builder™
Color one square using five gentle layers.
Day 5
Royal Leaf Study™
Complete one botanical leaf using the full workflow.
Day 6
Flower Petal Comparison™
Compare heavy-pressure coloring with layered coloring.
Day 7
Complete one small Escape Kingdom coloring page using everything you’ve learned.
Then compare it with one of your earlier coloring pages.
Most readers notice improvements in:
- smoother blending,
- richer color,
- cleaner transitions,
- more realistic shading,
- greater confidence.
👑 Royal Artist’s Wisdom
Don’t judge today’s coloring against someone else’s ten years of experience.
Instead…
Compare today’s coloring with your own work from last week.
That’s where you’ll notice genuine progress.
Artistic growth isn’t measured by perfection.
It’s measured by consistency.
Your Personal Pressure Journal
Consider keeping a small notebook beside your coloring supplies.
After each session, write down:
- Which pressure level did I use most?
- Where did I accidentally press too hard?
- Which area blended especially well?
- What will I try differently next time?
Within a month, you’ll begin seeing patterns that help you improve much faster than coloring alone.
🌿 Escape Kingdom Reflection
Pressure is more than a coloring technique.
It’s a way of thinking.
Every gentle layer says:
“I’m giving myself room to improve.”
Every controlled stroke says:
“I’m building this artwork patiently.”
As your pressure becomes more intentional, your coloring becomes more expressive.
You’ll no longer rely on force to create beautiful artwork.
Instead, you’ll rely on observation, patience, and purposeful layering.
That shift is one of the defining moments in every colorist’s journey.
Continue in Part 6
The final chapter completes this cornerstone resource with:
- Frequently Asked Questions
- Escape Kingdom Pressure Troubleshooting Guide™
- Common myths about pencil pressure
- Internal learning pathway
- Recommended Creative Lab lessons
- Related Royal Library resources
- Printable worksheet collection
- Pinterest content strategy
- “Continue Your Creative Journey”
- Future Creative Handbook notes
- Final Royal Artist’s encouragement
Module 6 – Troubleshooting, Frequently Asked Questions & Continue Your Creative Journey
Congratulations!
If you’ve completed all six parts of this guide, you’ve learned one of the most important foundational skills in colored pencil art.
You now understand:
- why pressure matters,
- how professionals use pressure differently from beginners,
- how to train your hand,
- how to apply pressure intentionally,
- and how to build smooth, vibrant color through patient layering rather than force.
Remember, mastering pencil pressure isn’t about becoming perfect overnight.
It’s about developing habits that will improve every coloring page you create from this point forward.
👑 The Escape Kingdom Pressure Troubleshooting Guide™
Even experienced colorists occasionally encounter problems.
The good news is that many of them can be solved simply by adjusting your pressure.
| Problem | Likely Cause | Escape Kingdom Solution |
|---|---|---|
| Colors look streaky | Pressing too hard too soon | Return to Whisper and Breeze Pressure, build more layers. |
| Paper feels shiny | Crown Pressure used too early | Stop burnishing and preserve the paper tooth for future layers. |
| Blending looks rough | Too few layers | Add several light layers instead of one heavy layer. |
| Pencil tip breaks often | Excessive pressure | Relax your grip and sharpen more frequently with gentle strokes. |
| Fingers become tired | Gripping too tightly | Hold the pencil more loosely and let your shoulder and wrist move naturally. |
| Colors won’t get darker | Paper tooth is full | Layer earlier in the process and reserve Crown Pressure for the end. |
| Artwork looks flat | Little variation in pressure | Increase contrast gradually using the Layer Pyramid™. |
The Five Biggest Myths About Pencil Pressure
Myth #1
“Professional artists always press lightly.”
Not true.
Professional artists use every pressure level.
The difference is that they choose the appropriate pressure at the appropriate time.
Myth #2
“Expensive pencils eliminate the need for pressure control.”
No pencil can compensate for poor technique.
Quality pencils make good technique easier—but they don’t replace it.
Myth #3
“Darker colors require heavier pressure.”
Often the opposite is true.
Rich color usually comes from multiple transparent layers.
Myth #4
“Burnishing should happen throughout the page.”
Burnishing is generally a finishing technique.
Using it too early removes your ability to continue layering.
Myth #5
“If my hand hurts, I’m working hard.”
Coloring isn’t weightlifting.
Relaxed, controlled movement produces better artwork than force.
Frequently Asked Questions
Should I always begin with Whisper Pressure?
Almost always.
Starting lightly preserves flexibility and allows you to make adjustments as your artwork develops.
Can I skip directly to Forest Pressure?
Sometimes—for tiny details or very dark accents—but most areas benefit from gradual layering first.
How many layers should I use?
There’s no universal number.
Instead, ask:
“Can this area still benefit from another light layer?”
If the answer is yes, keep building gradually.
Is Crown Pressure the same as burnishing?
Not exactly.
Crown Pressure is the amount of pressure you apply.
Burnishing is one technique that often uses Crown Pressure to blend and polish pigments.
Why do my colors look dull?
Common reasons include:
- using only one pencil color,
- pressing too hard too soon,
- skipping layers,
- not preserving highlights,
- or flattening the paper tooth.
Does paper affect pressure?
Absolutely.
Smooth paper, medium-tooth paper, and heavily textured paper all respond differently.
Understanding your paper is just as important as understanding your pencils.
(You’ll explore this further in future Creative Lab lessons.)
Should children learn pressure control?
Yes—but keep it simple.
Encourage them to think about “gentle coloring” before worrying about technical terms like Whisper or Breeze Pressure.
The habits they develop early can benefit them for years.
👑 Royal Artist’s Final Tips
As you continue your creative journey, remember these principles:
- Build slowly. Beautiful color grows through layers.
- Stay relaxed. A comfortable grip encourages smoother strokes.
- Protect the paper. The paper’s tooth is a valuable resource.
- Observe often. Step back and assess your work before adding more pigment.
- Practice consistently. Even a few minutes of focused practice each day will strengthen your control.
🌿 Continue Your Creative Journey
Now that you’ve mastered pencil pressure, you’re ready to build on this foundation.
Your recommended learning path:
CK-001 — How to Hold Colored Pencils (Review if needed)
↓
CK-002 — Understanding Pencil Pressure ✔
↓
CK-003 — How to Layer Colors
↓
CK-004 — How to Blend Colored Pencils
↓
CK-005 — Creating Smooth Color Transitions
↓
CK-006 — Avoiding Common Coloring Mistakes
↓
CK-007 — Coloring Your First Complete Page
Each lesson introduces a new skill while reinforcing the techniques you’ve already learned.
Related Creative Lab Resources
These articles naturally complement this guide:
- Choosing the Right Colored Pencils
- Best Paper for Coloring Pages
- Best Beginner Coloring Supplies
- Understanding Pencil Pressure
- How to Layer Colors
- How to Blend Colored Pencils
- Creating Smooth Color Transitions
- Color Theory Explained Simply
- Wax vs. Oil Colored Pencils
- Printing Coloring Pages at Home
Related Royal Library Articles
Continue exploring creativity with:
- Why Coloring Is Good for Your Brain
- How Coloring Reduces Stress
- Finding Your Personal Coloring Style
- Creative Inspiration for Beginners
- The Joy of Slow Creativity
- The Benefits of Daily Coloring Practice
- Building Confidence Through Creativity
- Creating a Relaxing Art Space
Continue Exploring Escape Kingdom
After practicing pencil pressure, you’ll also enjoy:
🎨 Coloring Kingdom
Put your new skills into practice with:
- Botanical coloring pages
- Fantasy flowers
- Nature collections
- Beginner-friendly printable pages
✨ Inspiration Kingdom
Observe how professional artwork uses:
- light,
- shadow,
- contrast,
- color harmony,
- and visual depth.
Try identifying where the artist likely used Whisper, Breeze, Forest, and Crown Pressure.
It’s a fun exercise that trains your artistic eye.
Pinterest Companion Content
To help readers discover this guide, consider creating:
- 📌 Standard Pin: “The 4 Levels of Pencil Pressure Every Beginner Should Know”
- 📌 Long Pin: “Why Your Coloring Looks Streaky (and How to Fix It)”
- 📌 Carousel: “The Escape Kingdom Pressure Spectrum™”
- 📌 Infographic: “The Royal Coloring Workflow™”
- 📌 Idea Pin: “7-Day Pressure Mastery Challenge”
These assets reinforce the article while encouraging readers to visit Escape Kingdom for the complete lesson.
Future Printable Resources (Planned)
As Escape Kingdom grows, this article can be expanded with downloadable resources such as:
- 📄 Pressure Ladder™ Practice Sheet
- 📄 Gradient Ribbon Worksheet
- 📄 Layer Pyramid™ Quick Reference Card
- 📄 Royal Coloring Workflow™ Checklist
- 📄 7-Day Pressure Mastery Challenge Tracker
- 📄 Pencil Pressure Self-Assessment Log
These resources will also become valuable additions to the Escape Kingdom Creative Handbook.
Final Reflection
Every great artist learns that beautiful coloring isn’t created by force.
It’s created by intention.
Each gentle layer, each thoughtful stroke, and each moment of patience contributes to a finished piece that’s richer, smoother, and more expressive.
The pencils in your hand haven’t changed.
Your understanding of how to use them has.
That’s the real beginning of artistic growth.
So the next time you pick up a colored pencil, don’t ask:
“How hard should I press?”
Instead ask:
“What does this part of the artwork need right now?”
That simple shift in thinking is one of the most powerful habits you can develop as a colorist.
Keep practicing, stay curious, and remember:
Every masterpiece begins with a single gentle stroke.
👑 Escape Kingdom Signature Achievement
Congratulations!
You have completed:
CK-002 — Understanding Pencil Pressure
Kingdom Badge Earned: 🏰 Foundation Lesson
You are now ready to continue your journey with:
➡ CK-003 — How to Layer Colors